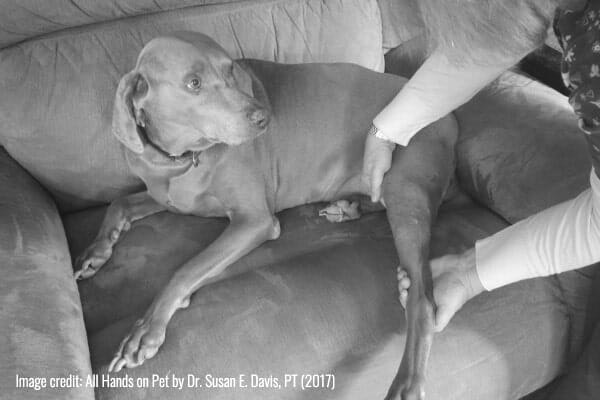
Have you noticed telltale signs of loss of mobility and range of motion in your senior dog? The good news is you can help preserve and protect your aging dog’s mobility through passive range of motion exercises. Dr. Susan Davis—internationally recognized author, physical therapist for animals, and friend of Dr. Julie Buzby—shares her expertise and valuable tips from her book All Hands on Pet!: Your How-To Guide on Home Physical Therapy Methods for Pets.
At every stage of a dog’s life, movement is essential to their overall well-being. If your four-legged friend has ever been sidelined for a few days or weeks because of injury or illness, you know just how true this is.
As your dog enters the golden years, movement becomes even more vital. It’s during these years when your dog may need your help to support and safeguard their mobility. The good news is that that is easy to do in the comfort of your home if you have the right knowledge, support, and tools.
In this article, I hope to give you a little bit of all three. Together, they will empower you to consider passive range of motion exercises to preserve your dog’s mobility. First, I’ll discuss why senior dogs lose their mobility as they age, then I’ll move on to share how you can get started with passive range of motion exercises for your grey-muzzled friend.
Why do senior dogs lose their mobility as they age?
Every joint in your senior dog’s body exists for the sole purpose of movement. Each joint has an available range of motion. When your dog’s joints are operating within a normal range of motion, your dog functions at their best. This occurs naturally in young and middle-aged dogs allowing you to enjoy active pastimes with your furry friend.

As your dog ages, however, joints tend to lose their natural mobility, and the available range of motion lessens. Here’s why that happens.
Normal aging coupled with a variety of health conditions causes senior dogs to become stiff and lose their previously enjoyed range of motion.
What common conditions affect a dog’s range of motion?
Here are a few common conditions that affect a dog’s range of motion:
- Canine arthritis such as osteoarthritis or degenerative joint disease.
- Obesity or excess fatty tissue that restricts the full movement of a joint. (Find your dog’s canine body condition score to determine if they are “just right” or need to lose a bit of weight.)
- Illness, injury, or surgery that requires a long rest period and restricted activity.
- Frailty syndrome in dogs that keeps a dog from moving about at a normal pace.
- Chronic neurological disease such as degenerative myelopathy that causes limb paralysis.
- Hip or elbow dysplasia that hinders a dog from easily getting up and down. (Read more on what causes hip dysplasia in dogs.)
- Diabetes that slows a dog’s metabolism, affects nerve transmission, and causes pain.
- Hearing loss and visual disturbances that prevent a dog from quickly responding to stimuli.
- Canine cognitive dysfunction that makes a dog restless and prone to wander, causing joint wear and tear.
- Dry, cracked paw pads that prevent sensory feedback and lead to falls and joint trauma. Dr. Buzby’s ToeGrips® help senior dogs conquer slippery floors and stairs.
If you recognize any of these conditions in your senior dog, passive range of motion exercises may be beneficial.
How do I evaluate my senior dog’s mobility?
If you are concerned about your senior dog’s mobility, it’s always a good idea to first make an appointment with your vet. Your vet can assess your dog’s joints then partner with a physical therapist for animals to provide a comprehensive plan for helping your dog improve their mobility. Here’s an overview of what your vet and animal physical therapist will look for.
Each of your dog’s joints has a typical range of motion measured in degrees. An abnormal range of motion means a joint is either too tight (hypomobile) or too loose (hypermobile). Hypomobile joints need specific range of motion exercises to gain flexibility and movement.
How is mobility measured in senior dogs?
A physical therapy examination includes joint movement and—if a joint is determined to be tight—a goniometer measurement of the available range of motion. The goniometer is a device we use to take exact measurements of a dog’s range of motion, in degrees, and compare it to the normal value. Sometimes a visual estimation of the range of motion occurs.
With either method, the animal physical therapist or rehabilitation veterinarian will document the starting range of motion degrees in the dog’s medical record and use it as a baseline. I advise you: know how the present range of motion compares to normal values, the likelihood that your dog will regain full range of motion, and the expected time investment required. The goal is to help you keep your dog’s joints as close to normal range of motion values as possible for optimal function.
What are passive range of motion exercises?
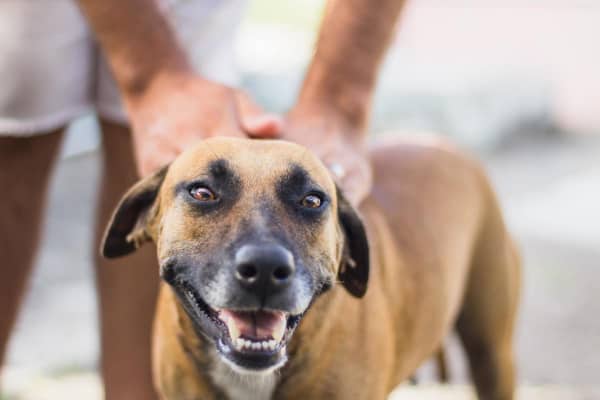
Passive exercises are very different than active exercises. Active exercises (or active-assisted) are performed when a dog is playful and alert. During active exercises, a dog is an eager participant and helps perform the movement with your guidance.
Passive range of motion exercises are exactly the opposite. These exercises are performed when a dog is fully relaxed — usually when it is tired, resting, or sleeping. Passive exercises ask nothing of the dog and everything of you. You gently perform all of the movement for the dog.
Which method is best? For senior dogs, passive range of motion exercises offer the purest, most complete method of keeping joints in top shape.
Are passive range of motion exercises right for every senior dog?
While many senior dogs will benefit from passive exercises, a senior dog owner must not perform passive range of motion exercises when certain situations exist. Use caution if you experience or suspect any of the following:
- Too large a range of motion: Hypermobility is the term used to describe the ability to move joints beyond the normal range of movement, which sometimes occurs because of trauma or certain bone diseases. These joints need rest and restriction from excessive motion so obviously passive range of motion exercises are not recommended. Your veterinarian or animal physical therapist will tell you not to do any range of motion exercises in these situations. Instead, a cast, splint, or wrap provides needed support to heal the instability.
- Stubborn or stiff joints: Sometimes a stubborn or stiff joint needs an extra push to make it move. You must not try to force a joint to move if it is ‘stuck.’ Instead, enlist the help of your veterinary professional to perform a manual technique of either joint mobilization or thrust manipulation to release the joint.
- Resistance to the exercise: If your dog seems uncomfortable and resists the exercise, or tenses up when you attempt the exercise, a simple change in technique might be required. Check back with your animal physical therapist or vet to ask about an alternative position or hand placement. If that does not work, respect the signal coming from your dog and stop the exercise.
- You feel uncomfortable or uncertain: If you feel queasy or uneasy touching the limb or moving the joint, it’s totally okay! I often encounter dog owners who tell me they do not like to handle their dog’s stiff or painful areas. I appreciate their honesty and so does your dog. In those cases, it’s perfectly fine to leave the job to your veterinarian or animal physical therapist.
One major word of warning: For the neck and spine area, only use active range of motion exercises with a toy or treat to encourage your dog to move with their own muscle power. Passive range of motion exercises are not safe for a dog owner to perform on a dog’s spine. Only a veterinarian or animal physical therapist should use passive techniques on the spinal column.
What terms do I need to know?
To get started with passive exercises, there are a few terms you need to know since dogs’ joints move in various ways and directions.
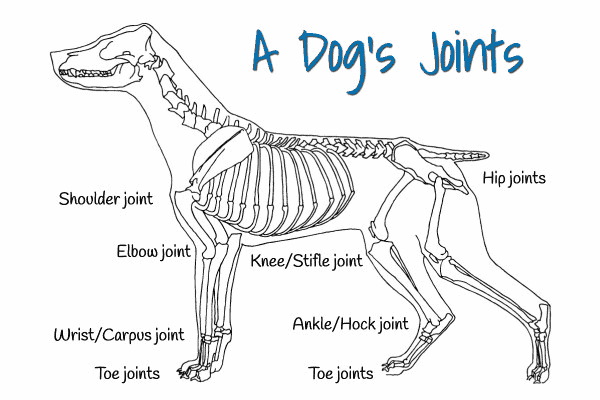
Here are the terms we use to describe the movement directions of various joints:
Hip and shoulder joints
- Flexion: in which the limb moves forward and upward (in the case of the hip) or backward (in the case of the shoulder), decreasing the joint angle
- Extension: in which the limb moves backward (in the case of the hip) or forward and upward (in the case of the shoulder), increasing the joint angle
- Abduction: in which the limb moves away from the body and out to the side
- Adduction: in which the limb moves close to and across the body
- Rotation: the limb turns inward and outward
Elbow and knee joints
The elbow and knee are hinge joints and simply bend and straighten. Here are the terms used for hinge joints:
- Extension: or straightening
- Flexion: or bending
Wrist and ankle joints
The joints at the ends of your dog’s limbs are the wrist (carpus) joints and the ankles (hock) joints.
The wrist joint moves into three directions:
- Extension: or bending up as if the paw is in a “wave” position
- Flexion: bending down with the paw tucked in toward the body
- Deviation: where the paw moves from side to side
The ankle joint bends in several directions, but the two main are:
- Flexion or toes up direction where the paw bends toward the dog’s head
- Extension or toes down direction where the paw points away from the body and toward the tail.
Each paw has a set of digits, like our fingers and toes, which are small hinge joints that bend (flex) and straighten (extend).
How can I properly begin a passive range of motion exercise routine?
Proper technique is essential to avoid jarring or twisting stress on joints during passive range of motion exercises. Your dog’s veterinary team or physical therapist will be more than happy to show you how to do the exercises the first time and provide written instruction or a video so you can carefully duplicate the movement as homework.
Passive range of motion exercises usually involve five to ten repetitions at each joint, two to three times per day. Most dog owners are quite capable of performing the movements. However, it is worth repeating that if you feel uncomfortable or uneasy at any point, it is better to have a professional provide the service. There is no shame in being honest about your comfort level on behalf of your dog!
Getting started with passive range of motion exercises step-by-step
Step one: Get in position and don’t squeeze!
The first step is to lay your dog on their side in a comfortable position. Carefully move each joint five to ten times, keeping your hands relaxed, cradling and supporting the limb with a loose grip. Never squeeze or grip hard on the dog’s limbs. Try to use your palm and the web space between your thumb and index finger, not your fingertips or thumb when holding and moving the limb.
The most common error I see is the tendency for a dog owner to press with their thumbs or squeeze the dog’s limb too hard. The dog will let you know right away by pulling back or fighting your efforts. Keep everything light, easy, smooth, slow, and steady! You will know you are doing things right if your dog stays relaxed and comfortable.
Step two: Move to the front limbs.
Starting with the front limb, place one hand on the shoulder blade and the other on the upper portion of the limb, and flex and extend the shoulder.
Flexing the limb should simulate a normal weightbearing standing position and can be achieved by carefully drawing the upper portion of the limb backward. Then use the hand on the back side of the upper limb to gently stretch the leg forward and upward.
Move on to the elbow with your hands placed one above and the other below the joint. Gently bend and straighten the elbow.
For the carpus joint, place one hand on the forearm and the other on the dog’s paw then slowly flex and extend the joint.
Step three: Continue to the hind limbs.
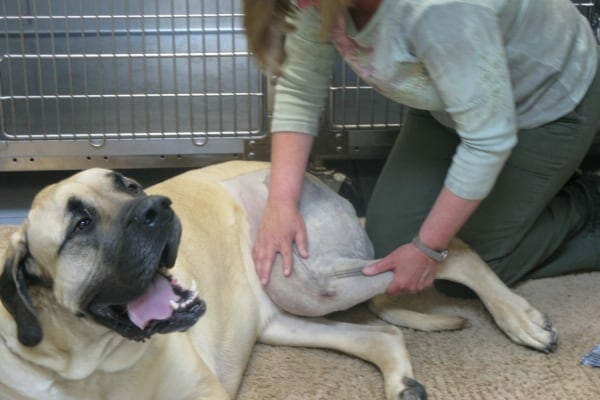
Moving to the hind limb, bend and straighten the hip into flexion and extension placing one hand on the dog’s rump and the other hand around the thigh. While at this joint, perform abduction, gently moving the thigh away from the body (similar to a groin stretch), then back to the start position.
Next, move down to the knee joint placing one hand on the thigh and one on the lower leg.
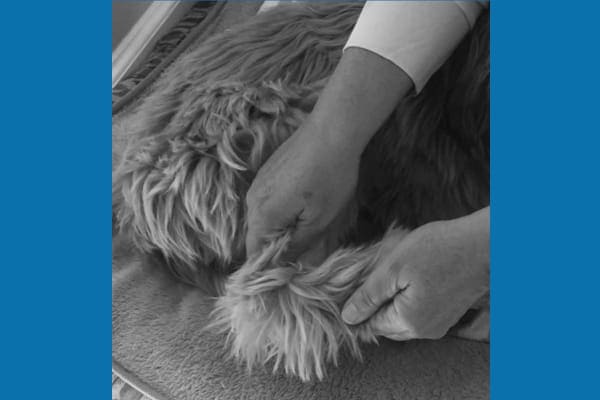
Image credit: All Hands on Pet by Dr. Susan E Davis, PT (2017)
Gently straighten, extending the knee, then reverse the motion into flexion or bending.
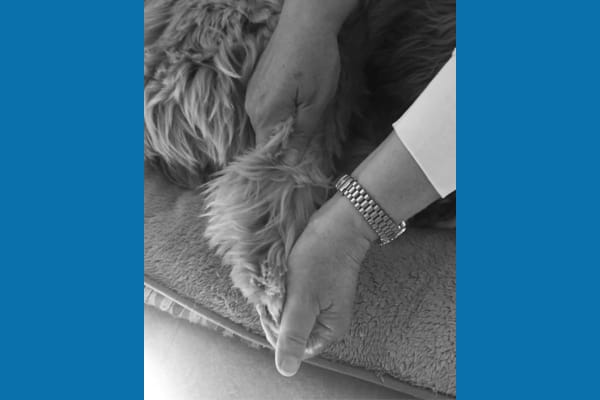
Image credit: All Hands on Pet by Dr. Susan E Davis, PT (2017)
Finish with the ankle joint. Flex the ankle by placing your hands on the dog’s lower leg and rear paw, and pulling the paw forward and up. Then extend it by pointing the paw back and down.
Step four: Finish up with the toes.
Finish by bending and straightening the digits (“toes” and “fingers”) of each paw either individually or by cupping your hand around the entire paw and moving the digits together as a group. Dogs often dislike their digits moved so the latter technique might be easiest to perform.
With all these exercises, always stop when you feel any tension or resistance and stay in the natural scope the joint allows. Never force the joint to move beyond its limits. Your senior dog will benefit from passive range of motion exercises performed with safety and comfort in mind.
Passive range of motion exercises for your senior dog
If you believe your senior dog could benefit from passive range of motion exercises, there’s no better time than now to get started. Schedule an appointment with your veterinarian and animal physical therapist and get their input on the perfect exercises for your dear old dog. My guess is that you’ll see great improvements in your dog’s mobility — and your dog.

Do you have experience with mobility exercises for your senior dog?
Share in the comments below so we support and encourage one another.


We welcome your comments and questions about senior dog care.
However, if you need medical advice, diagnosis, or treatment, please contact your local veterinarian.